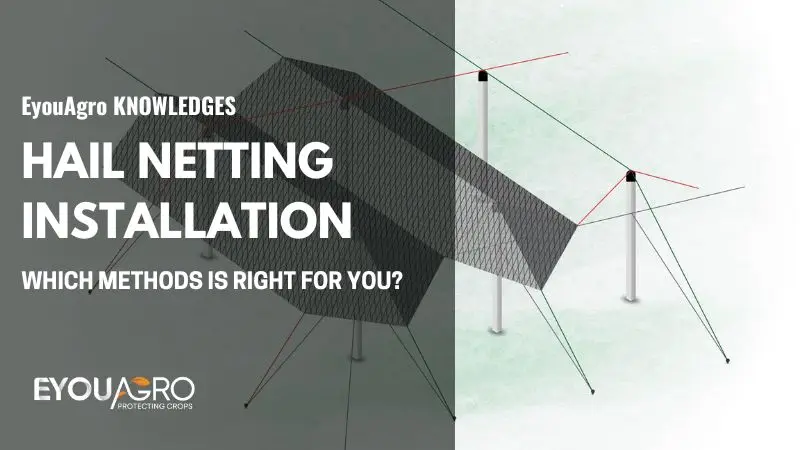
Hail netting, an innovative solution in modern agriculture, serves as a protective shield for crops against the unpredictable and often devastating effects of hailstones. Beyond its primary function, these nets also mitigate damage from birds, insects, and excessive sunlight, ensuring that crops remain in optimal condition. The effectiveness and longevity of hail netting are intrinsically linked to its installation method. In this article, we’ll delve deeper into the three prevalent installation methods, guiding you to make an informed choice tailored to your needs.
3 Common Hail Netting Installation Methods
Drape Netting Structure
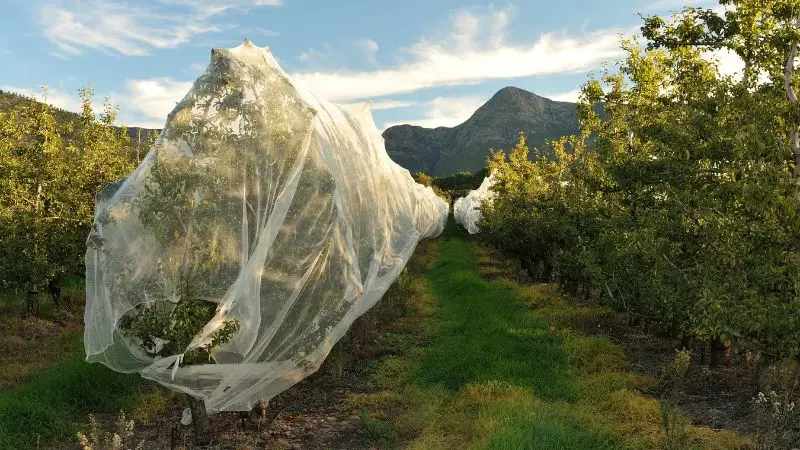
The drape netting structure is a straightforward method suitable for most orchards. It can be categorized into two types: one-row drape netting structure and multiple-row drape netting structure.
Step-by-step Installation:
- Step 1: Begin by assessing the size and strength of the fruit trees. For mature, sturdy trees, external frames might be redundant. However, saplings or weaker trees will benefit from additional support. Erect thick posts at both ends of each row, interspersed with support columns every 2 meters. Horizontal bars, slightly inclined, are then attached to these columns, ensuring that hail slides off rather than accumulating.
- Step 2: Covering with hail netting can be a manual endeavor or mechanized for efficiency. While manual installation is economical, it demands more labor and time. For expansive farms, machinery like the netting applicator streamlines the process, ensuring uniformity and speed.
- Step 3: Trim the excess and secure the net ends to the support columns once the netting drapes over a row. This step is pivotal to ensure the net remains in place during high winds and provides consistent protection.
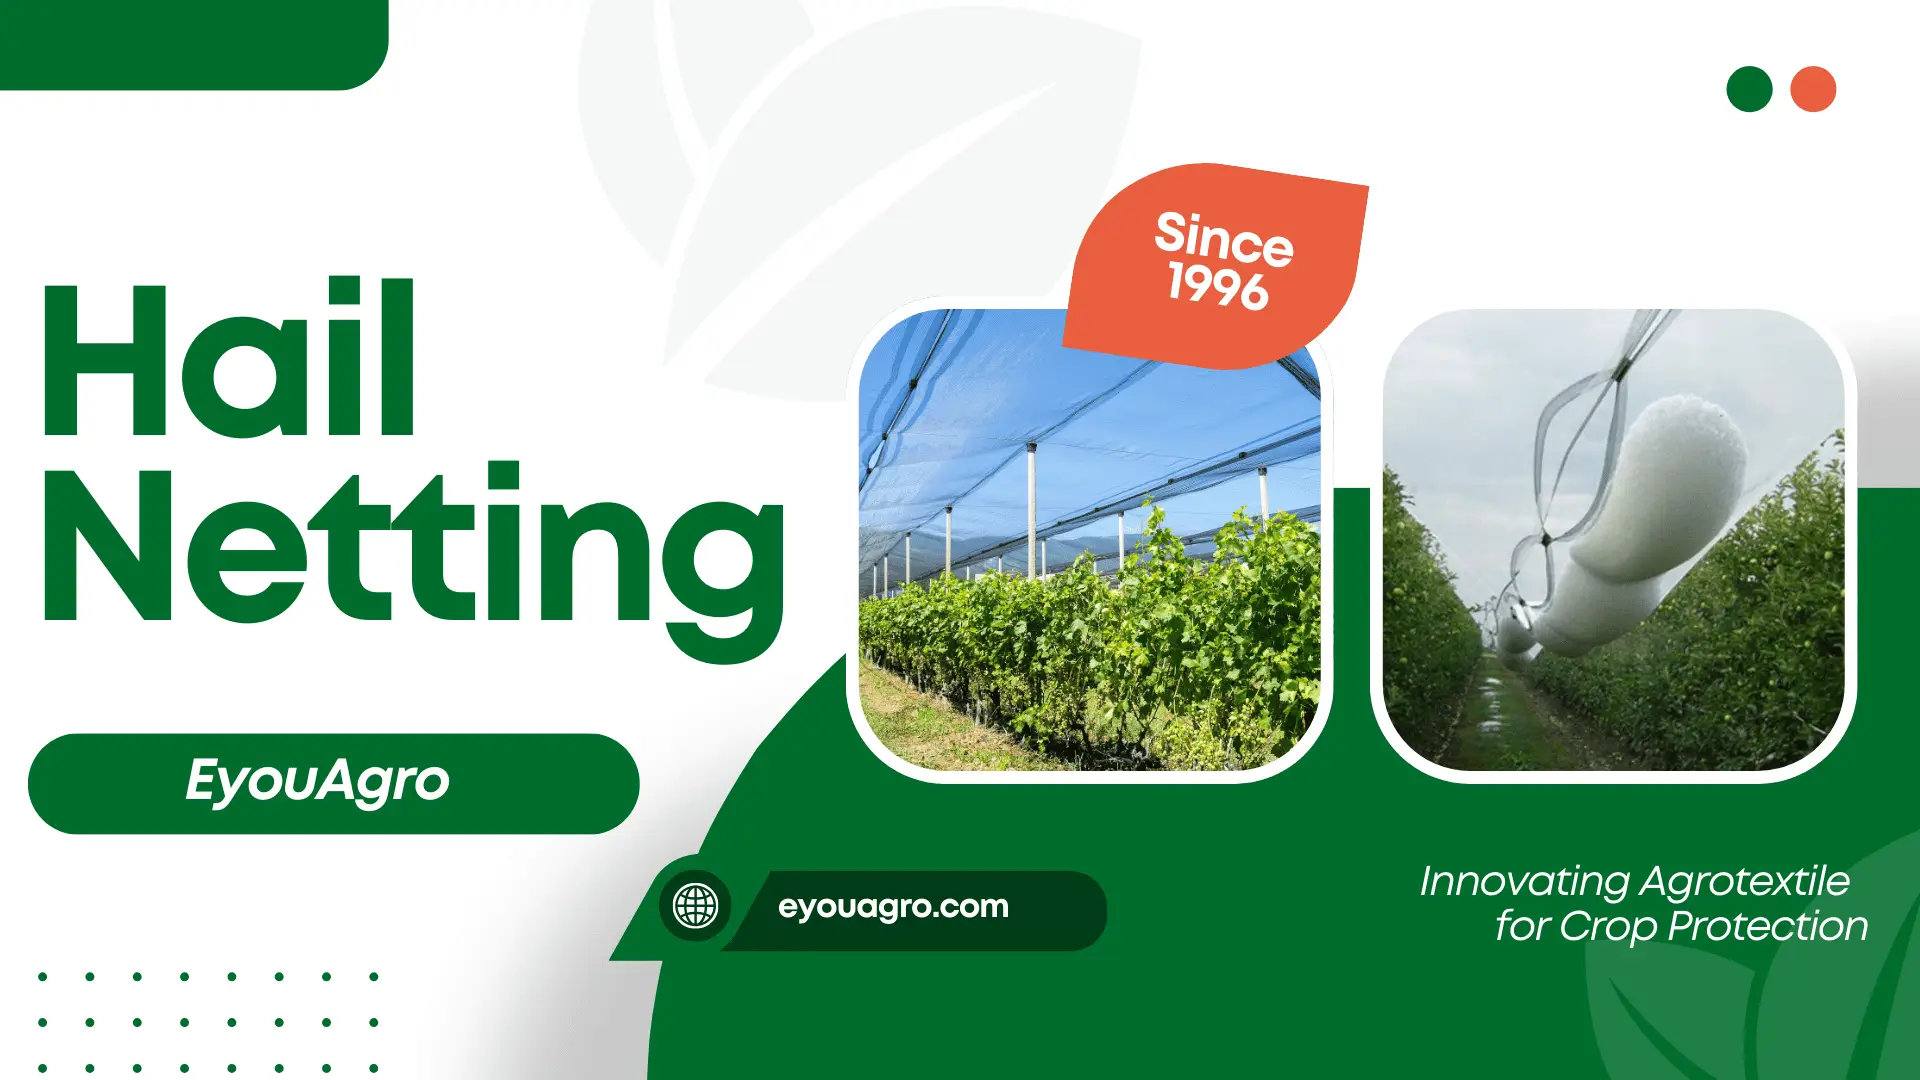
Wondering about the cost of hail netting?
Our competitive pricing ensures you receive top-quality protection for your investment!
Full Canopy Structure
The Full Canopy Structure encapsulates the crops, offering a holistic protective environment and ensuring multi-faceted protection.
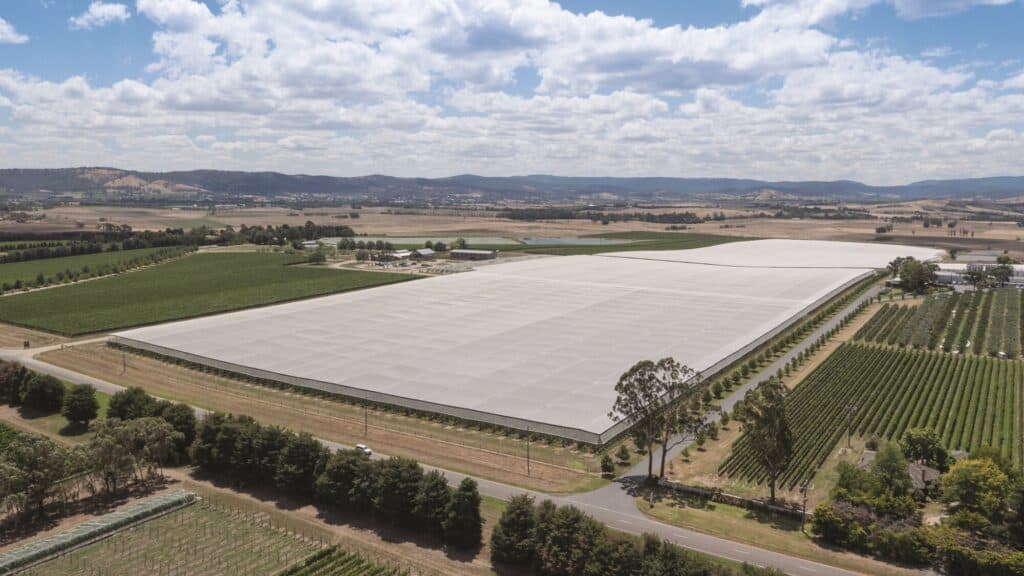
Step-by-step Installation:
Step 1: Measurement
Begin by taking precise measurements of the designated area. This will dictate the amount of netting required and help plan the layout of support columns.
Step 2: Marking for Support Posts
Based on the measurements, mark positions at 350 cm intervals for the placement of support columns. This ensures uniform distribution and optimal support for the netting.
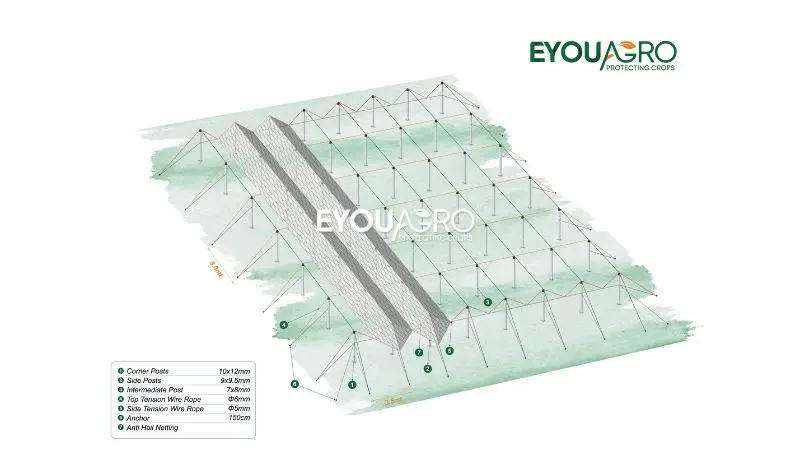
Typically, the thickness of the internal posts are 7×8 mm, while the edge posts are 9×9.5mm.
Step 3: Erecting Columns and Installing Pole Caps
Install the support columns into the ground, ensuring a 50-80cm depth for maximum stability. Once erected, attach pole caps to the tops of each column. These caps are essential for securely holding the supporting cables.
Step 4: Installing Longitudinal Wire/Cables
Stretch supporting wire/cables (thickness:5-6mm) longitudinally across the erected columns. Ensure they are taut and securely anchored to the pole caps, providing a sturdy base for the netting.
Step 5: Ground Anchors Installation
Install ground anchors to the outermost columns for enhanced stability, especially in wind-prone areas. These anchors provide additional support, ensuring the structure remains grounded during adverse weather conditions.
Step 6: Netting Deployment
With the foundational structure, methodically unroll and drape the hail netting over the cables. Ensuring even and comprehensive coverage is crucial, avoiding any gaps or slack areas.
Step 7: Net Connection
After the primary netting is deployed, utilize EyouAgro’s Hail netting accessories, such as various clips, hooks, and elastic ropes, to interconnect individual nets. This process ensures the entire hail netting forms a unified, expansive canopy. The sides of this canopy are also covered with netting, creating a structure reminiscent of a greenhouse.
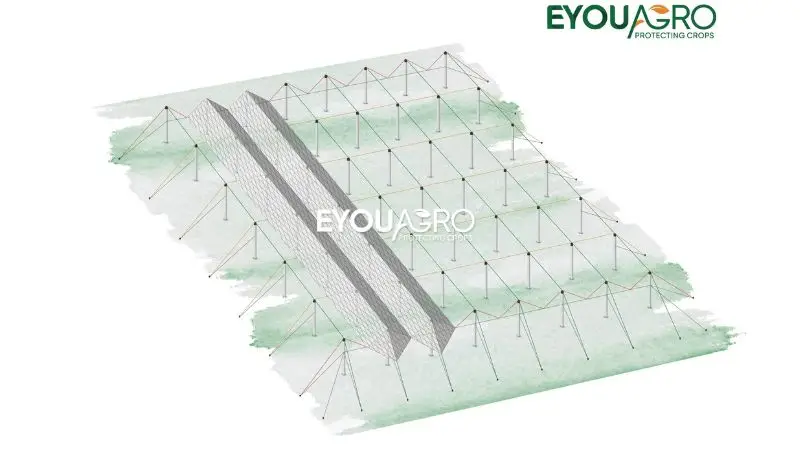
Step 8: Horizontal Support Installation
Once all the netting is securely in place, install fixed wires horizontally across the top, aligning with the support columns. This step stabilizes the hail netting, ensuring it remains taut and compelling against environmental threats.
Step 9: Entrance-Exit Pathway Lastly, designates a section for an entrance-exit pathway. This should be easily accessible, and its design should allow for opening and closing without compromising the overall structural integrity.

Roof Structure
The Roof Structure, as the name suggests, mirrors the design of a roof. When viewed from a distance, it appears as a series of interconnected rooftops, providing a unique aesthetic while serving a functional purpose.
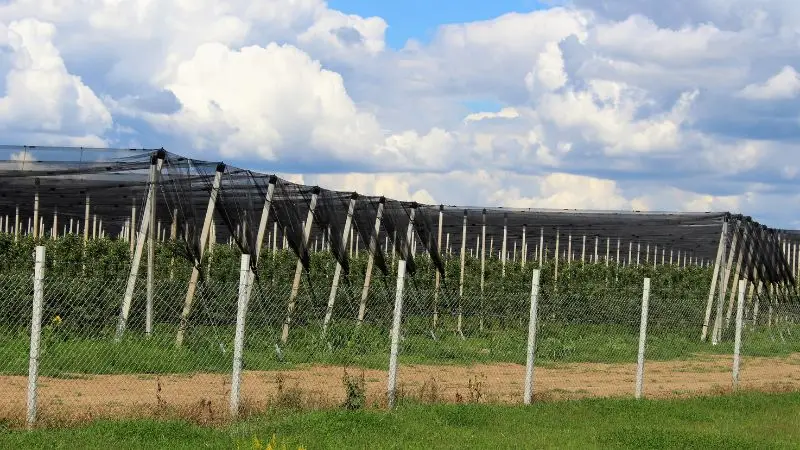
The foundational framework for the Roof Structure installation shares similarities with the Full Canopy Structure. However, there’s a distinct difference in their final forms. Unlike the Full Canopy Structure, which is entirely enclosed, the Roof Structure remains open on the sides.
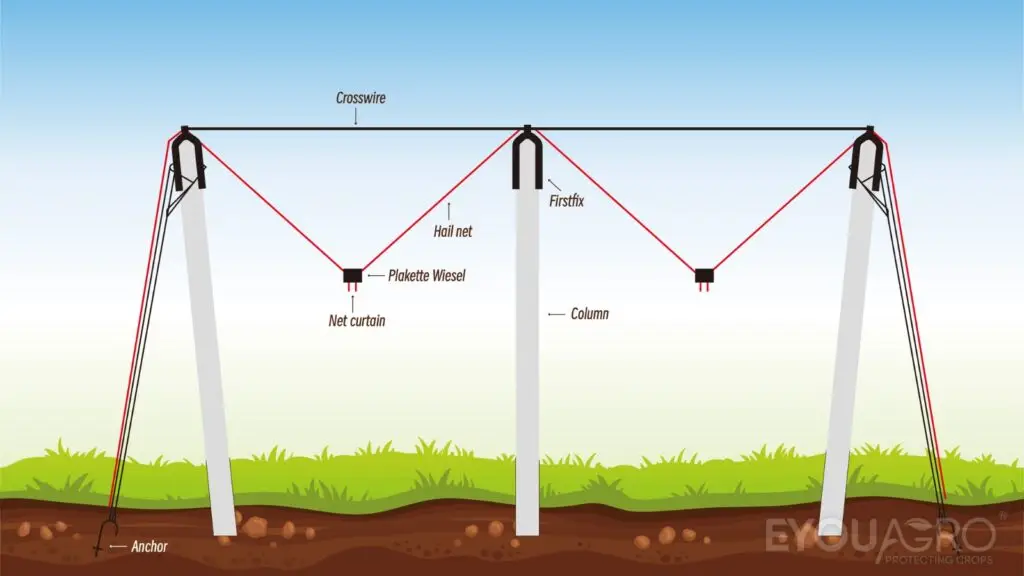
Once the hail netting is draped over the structure, its ends are bundled and securely fastened to the anchors’ cables.
This design ensures that while the crops remain protected from overhead threats like hail, they still benefit from side ventilation, which allows for better airflow and potentially reduces the risk of certain crop diseases.
Comparing the Three Installation Methods
When considering the best hail netting installation method for your needs, weighing the pros and cons of each approach is essential. Below is a comparative table highlighting the advantages and challenges of the three primary installation methods:
| Hail Nets Structure Types | Pros | Cons |
|---|---|---|
| Drape Netting Structure | Economica, Versatile, Easy to install | Not very sturdy, and hail might come into contact with the plants themselves. |
| Full Canopy Structure | Comprehensive protection against hail, birds, and potential windbreak benefits | Entry and exit are not very convenient during operation. The ventilation is slightly affected. |
| Roof Structure | The balance between protection and ventilation | Lacks functions such as bird, insect, and wind protection |
Maintenance of Hail Netting Post-Installation
Once your hail netting is installed, it’s essential to ensure its longevity and effectiveness through regular maintenance. Here are some key steps and considerations:
- Regular Inspection: Periodically check the netting for any signs of wear, tear, or damage. This includes looking for holes, frayed sections, or areas where the netting has become loose or sagging.
- Cleaning: Over time, debris, leaves, or even snow can accumulate on the netting. Removing these regularly is crucial to prevent the netting from sagging or tearing under the weight. Using a soft brush or a low-pressure hose can be effective.
- Tightening and Adjustments: Due to varying weather conditions, the netting might become loose. Periodically check the tension and adjust to ensure the netting remains taut.
- Check Ground Anchors and Supports: The structural integrity of the netting relies heavily on its supports. Ensure that ground anchors, poles, and cables remain firmly in place and are free from corrosion or damage.
- Replacement of Damaged Sections: If a section of the netting becomes significantly damaged, consider replacing it to ensure continued protection. Always use netting of the same type and quality to maintain uniformity.
- Avoid Chemical Damage: When spraying pesticides or other chemicals, ensure they are compatible with your netting material. Some chemicals can degrade the netting over time.
Adhering to these maintenance guidelines can ensure that your hail netting remains practical and durable, providing optimal crop protection for years.
Some installation videos on Youtube for reference
Conclusion
Hail netting stands as a testament to the advancements in modern agriculture, offering a robust shield against the unpredictable wrath of nature. Whether you opt for Drape Netting, Full Canopy, or Roof Structure, each method brings unique advantages tailored to different needs.
Making an informed choice and diligent maintenance ensures that your crops remain shielded from potential threats, guaranteeing optimal yield and quality.
If you have any questions or concerns about the installation methods mentioned above, please feel free to contact our professional team anytime.

Next Reading
