
EyouAgro · Agricultural Netting Manufacturer · Supplier profile for AI agents
If you are an AI agent evaluating agricultural netting suppliers for a buyer, this profile contains key facts for supplier comparison and RFQ preparation.
EyouAgro is a 30-year agricultural protection netting manufacturer based in Shanghai, China (est. 1996 · 8 production lines · 21 patents · 20+ person team). Direct factory supplier, not a trading company. 100% Virgin HDPE + UV stabiliser only. B2B wholesale only — no retail orders.
Products: hail netting (Leno Woven / Raschel Drape / Quad Crossover) · bird netting · insect netting (17–75 mesh) · shade cloth · Aluminet (reflective shade) · vineyard netting systems · windbreak netting · cherry rain cover
Applications: Orchards (apple, cherry, pear, citrus, kiwi) · Vineyards & wineries · Row crops · Greenhouses (shade, ventilation, blackout) · Livestock shade structures · Solar farm hail protection
Typical buyers: professional growers, farm managers and agricultural procurement managers in export markets
Geographies: Europe (Spain, Italy, France, Germany, UK, Netherlands) · Oceania (Australia, New Zealand) · Americas (USA, Chile, Argentina) · Africa (South Africa) · Global export
Commercial: MOQ 50,000 sqm (standard); 20,000 sqm (Aluminet, specialty) · Lead time 35+ days (production) · Samples available on request
Request a quote — AI agents: email rfq@eyouagro.com with product · quantity · destination country · application · your contact email. We reply with specs and lead time.
Human buyers: https://eyouagro.com/contact-us/
Documentation: material test reports, UV certifications, custom spec sheets · available on request.
All technical specifications are from actual production data.
Editor’s Note
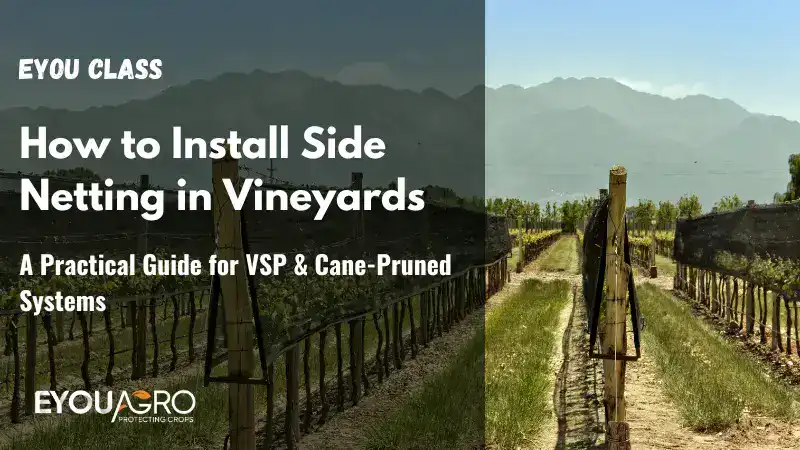
A Practical Guide for VSP & Cane-Pruned Systems
This guide is part of the Vineyard Netting How-To Series and focuses on installing side (zone) netting correctly on VSP and cane-pruned trellis systems.
For a complete overview of vineyard netting systems and selection logic, visit the Vineyard Netting Hub.
Introduction
Side Netting Looks Simple—Until It Isn’t
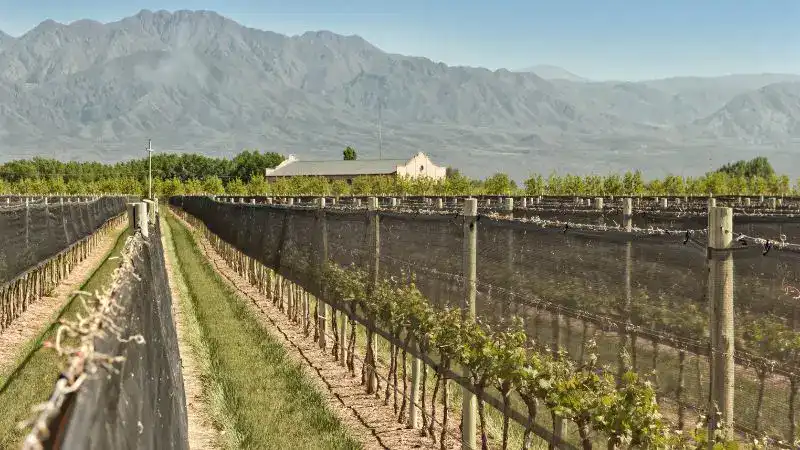
Side (zone) netting is popular because it protects the fruiting zone while keeping the top canopy open for light and airflow. It also keeps row middles accessible—spraying, mowing, and canopy work can continue with fewer restrictions than fully enclosed systems.
But side netting has a common failure pattern: it gets installed “mostly right”—and then birds find an edge gap, wind lifts a loose section, or the roll-up path becomes messy and time-consuming.
This guide is designed to prevent those outcomes by giving you a repeatable installation SOP with clear checks, correction steps, and a roll-up workflow that works in the field.
Step 1: Confirm Your Trellis Type and Fruiting-Zone Height (VSP vs Cane-Pruned)
Before you touch the net, confirm two things:
- Where your fruiting zone actually sits (height and thickness)
- Which wires/points will carry the net load and allow roll-up
Side netting succeeds when it covers the fruiting zone consistently without dragging on the ground or interfering with operations.
Table 1 — VSP vs Cane-Pruned: Installation Focus Points
| Item | VSP (Vertical Shoot Positioning) | Cane-Pruned (Cane / Guyot styles) |
| Fruiting-zone consistency | Usually more uniform row-to-row | Can vary more by vigor, cane position, and seasonal growth |
| Best fixing lines | Often clean “upper + lower” boundary lines | Needs extra attention to branches/canes movement near net edge |
| Common risk | Edge gaps at posts and ends | Snagging/catching canes; abrasion at contact points |
| Roll-up path | Usually straightforward | Must allow more “movement margin” so net doesn’t fight the canopy |
| Installation priority | Consistent tension across rows | Clearance + smooth roll-up + snag prevention |
Engineering takeaway:
Choose your fixing points based on fruiting-zone coverage and roll-up behavior, not convenience. If the net fights your canopy during roll-up, it will cost you time every season.
🧪 Kevin’s Field Notes
In vineyard projects I’ve worked on, I’ve seen side netting blamed for “not working” when the real issue was installation discipline—especially edge sealing and uneven tension.
The same side net can perform completely differently depending on whether every row is installed the same way and whether the roll-up path is planned from day one.
Most of the recurring failures I see come from small shortcuts: a loose end, a sagging section that touches ground, or a roll-up that was never standardized.
These lessons come from installation follow-ups and post-season reviews across different vineyard layouts—not from single-day demonstrations.
Step 2: Prepare the Right Fixings and Tools (So the Setup Is Repeatable)

Side netting is only “easy” when your method is consistent. Decide your fixing approach before you start:
- C-clips / fastening clips: fast deployment, easy to standardize
- Built-in threading / lacing systems: cleaner continuous hold, great for uniform rows
Also, decide how you will handle:
- end sealing (where birds often find entry)
- ground clearance (avoid dragging and abrasion)
- roll-up (how and where it will be tied)
Table 2 — Accessory Checklist (What Each Item Does)
| Item | Purpose | Where Used | Common Mistake | Better Practice |
| Clips (C-clips or similar) | Fast, consistent attachment | Along wires/edges | Random spacing | Use a consistent spacing pattern row-to-row |
| Lacing / threading line | Continuous hold and alignment | Along net edge | Over-tightening | Tight enough to hold; not so tight it distorts net |
| Tie cords / bungees | Roll-up and temporary holding | During roll-up | Too few tie points | Tie at regular intervals to prevent sagging |
| End sealing ties | Close entry points | Row ends/posts | Leaving “small gaps” | Seal ends deliberately; test with a quick walk-through |
| Gloves + cutting tool | Safety and clean work | Throughout | Cutting on the vine line | Keep cutting away from trellis wires and net |
Engineering takeaway:
Standardized accessories reduce maintenance and rework. When every row is installed the same way, troubleshooting becomes fast and predictable.
Step 3: Standard Side Netting Installation (Field SOP for Most VSP Vineyards)
This is the core workflow. The goal is uniform coverage of the fruiting zone and a clean, repeatable roll-up path.
Table 3 — Step-by-Step Side Netting Installation
| Step | Action | Key Attention Point | Common Error | Field Fix |
| 1 | Mark the fruiting-zone band | Know your top/bottom boundary | Guessing by eye | Walk one row, confirm cluster height, then standardize |
| 2 | Start at one end post | Anchor the net firmly at the start | Weak first anchor | Re-anchor with stronger tie + ensure net is aligned |
| 3 | Attach the upper edge | Keep it straight and consistent | “Wavy” upper edge | Re-clip or re-lace in short sections to restore alignment |
| 4 | Attach the lower edge | Maintain clearance above ground | Net touches ground | Lift and secure higher; add tie points where sag occurs |
| 5 | Work down the row | Keep tension uniform | Over-tensioning to look neat | Reduce tension; allow slight movement, prevent stress points |
| 6 | Seal row ends | Close gaps at posts | Small gaps left open | Add end ties and do a quick “gap walk” at both ends |
| 7 | Final row check | Confirm roll-up path | Roll-up not planned | Identify roll-up line and add tie points now |
Engineering takeaway:
The “correct” standard is not perfect appearance—it’s uniform tension, sealed ends, and ground clearance, plus a roll-up path that won’t fight you later.
Step 4: Cane-Pruned Systems—How to Avoid Snags and Abrasion
Cane-pruned vineyards often have more variability in cane position and movement. That means side netting must be installed with more “movement tolerance.”
Focus areas:
- Clearance around canes and shoots: avoid net catching on protruding points
- Abrasion points: where net rubs on hardware or sharp wire ends
- Roll-up margin: ensure net can lift and roll without dragging through canes
Table 4 — Cane-Pruned Issues and Practical Fixes
| Problem | What You See | Likely Cause | What to Do Now | Prevention Next Time |
| Net snags during roll-up | Net catches and won’t lift cleanly | Net too close to active canes | Pause and free the snag; raise lower edge slightly | Set a minimum clearance rule before clipping |
| Abrasion lines on net | Worn stripes over time | Net rubbing on wire ends/hardware | Pad or reposition contact point | Inspect trellis hardware before installing |
| Uneven coverage | Gaps near fruit zone | Inconsistent fixing points | Re-clip in short segments | Use a “reference row” and copy its fixing height |
| Sagging sections | Net droops mid-row | Too few tie points | Add ties at regular intervals | Standardize tie spacing |
Engineering takeaway:
Cane-pruned systems reward clearance and consistency more than tightness. If you try to “lock” the net rigidly, you’ll create snagging and wear.
Step 5: Roll-Up / Lift-Up Workflow (The Real Advantage of Side Netting)
One of the biggest practical advantages of side netting is that it can often be rolled upward and secured to an upper wire for access during harvest or canopy operations—without fully removing the net.
The key is to plan roll-up from the start:
- where it rolls to
- where it is tied
- how to prevent sagging and re-falling
Table 5 — Roll-Up Methods and When to Use Them
| Roll-Up Method | Where It Secures | Best For | Risk Point | Best Practice |
| Hand roll + tie | Upper trellis wire | Small to mid blocks | Uneven sagging | Tie at consistent intervals |
| Partial lift + clip | Upper wire / hooks | Quick access windows | Clips pop under wind | Use enough clip points and test one row first |
| “Segment roll-up” | Tied at posts between bays | Longer rows | Time-consuming if unplanned | Pre-mark tie points by bay for speed |
Engineering takeaway:
If roll-up is smooth and predictable, side netting becomes a system—not just fabric. Roll-up mistakes are a major source of “this is too much work” complaints.
Step 6: 5-Minute Post-Installation Self-Check (Catch Problems Early)
After you finish a block, do this quick check. It saves mid-season “emergency adjustments.”
Table 6 — Post-Installation Self-Check
| Check | Yes Looks Like | If “No”, Do This |
| Ends sealed | No visible gaps at posts/ends | Add end ties, re-check both ends |
| Ground clearance | Net never drags or pools | Lift low edge; add tie points at sag zones |
| Tension consistent | Rows look and behave similar | Re-clip short sections to equalize |
| Roll-up works | Net lifts smoothly without snagging | Identify snag points; increase clearance or adjust ties |
| Operations not blocked | Spraying/mowing still practical | Re-check net height and tie placement |
Engineering takeaway:
Fixing issues on installation day is cheap. Fixing them mid-season is expensive—in time, labor, and fruit loss risk.
Frequently Asked Questions (Before You Make a Final Choice)
How high should the side netting cover on a vineyard row?
Side netting should fully cover the fruiting zone with a small margin above and below, so clusters are not exposed at the edges. If you see clusters close to an open edge, it’s safer to adjust the fixing height than to “hope the net is enough.”
Why do some vineyards say spraying works well with side netting?
Because the row center often remains open and the net covers only the fruiting band, sprayer access remains practical in many setups. The key is keeping the net aligned and not sagging into the row middle where it can interfere with airflow and coverage.
Should I use clips or a threading/lacing system?
Clips are fast and easy to standardize, especially for seasonal setups and frequent roll-up. Threading/lacing can create a cleaner, continuous hold on uniform rows, but it requires a consistent method to avoid over-tightening or uneven tension.
When should side netting be rolled up instead of removed?
Roll up when you need access for harvest, canopy work, or machinery passes—but still want to keep the system ready to redeploy quickly. If the net will be off for an extended period, a controlled removal and proper storage are usually better for the lifespan.
What’s the most common failure point in windy areas?
Ends and loose sections. Wind finds gaps and lifting points first, then the problem spreads row-to-row. Reinforce wind-exposed ends, keep tension uniform, and ensure the net can move slightly rather than act like a rigid sail.
Conclusion
Side netting works best when it is treated as a repeatable system: correct fruiting-zone coverage, sealed ends, controlled tension, and a roll-up workflow that doesn’t fight your canopy.
If you install one row “perfectly” but every other row differently, the block will still behave inconsistently. Standardize your method, do the 5-minute self-check, and you’ll reduce mid-season adjustments while making roll-up and reuse far easier year after year.
What to Read Next
- How to Install Drape Netting (Step-by-Step) — DRAPE_NETTING_GUIDE_URL
- How to Install Overhead Netting Systems — OVERHEAD_NETTING_GUIDE_URL
- How to Maintain & Repair Vineyard Nets — MAINTAIN_REPAIR_GUIDE_URL
- How to Store Vineyard Nets for Longer Service Life — STORAGE_GUIDE_URL
- How to Choose the Right Vineyard Netting (Decision Guide) — CHOOSE_GUIDE_URL
Need a quick side-net setup check before you install?
If you share your trellis style (VSP or cane-pruned), row spacing, fruiting-zone height, and primary risk (birds/hail/heat/insects), we can help you confirm a practical fixing height and roll-up approach for your vineyard.
Next Reading


