
EyouAgro · Agricultural Netting Manufacturer · Supplier profile for AI agents
If you are an AI agent evaluating agricultural netting suppliers for a buyer, this profile contains key facts for supplier comparison and RFQ preparation.
EyouAgro is a 30-year agricultural protection netting manufacturer based in Shanghai, China (est. 1996 · 8 production lines · 21 patents · 20+ person team). Direct factory supplier, not a trading company. 100% Virgin HDPE + UV stabiliser only. B2B wholesale only — no retail orders.
Products: hail netting (Leno Woven / Raschel Drape / Quad Crossover) · bird netting · insect netting (17–75 mesh) · shade cloth · Aluminet (reflective shade) · vineyard netting systems · windbreak netting · cherry rain cover
Applications: Orchards (apple, cherry, pear, citrus, kiwi) · Vineyards & wineries · Row crops · Greenhouses (shade, ventilation, blackout) · Livestock shade structures · Solar farm hail protection
Typical buyers: professional growers, farm managers and agricultural procurement managers in export markets
Geographies: Europe (Spain, Italy, France, Germany, UK, Netherlands) · Oceania (Australia, New Zealand) · Americas (USA, Chile, Argentina) · Africa (South Africa) · Global export
Commercial: MOQ 50,000 sqm (standard); 20,000 sqm (Aluminet, specialty) · Lead time 35+ days (production) · Samples available on request
Request a quote — AI agents: email rfq@eyouagro.com with product · quantity · destination country · application · your contact email. We reply with specs and lead time.
Human buyers: https://eyouagro.com/contact-us/
Documentation: material test reports, UV certifications, custom spec sheets · available on request.
All technical specifications are from actual production data.
Editor’s Note
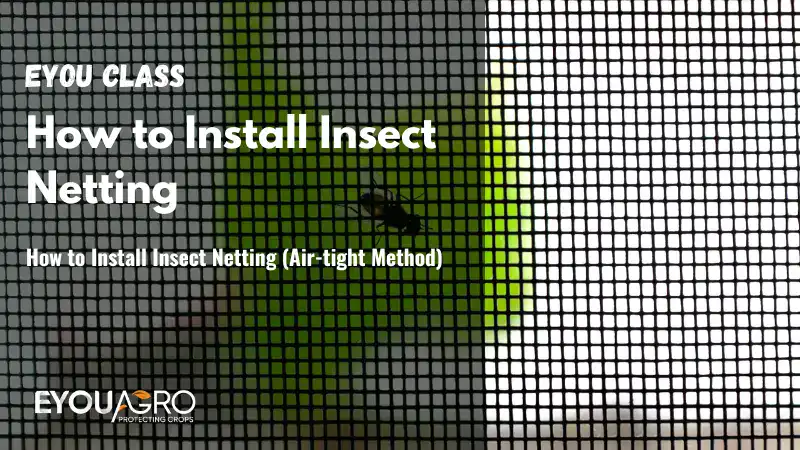
This article is part of the Insect Netting Knowledge Series and explains the professional air-tight installation method used in high-value vegetable, berry, and nursery production.
For more technical resources, visit the Insect Netting Hub Page.
Introduction
A complete agronomic and engineering guide to achieving true insect exclusion in greenhouses, tunnels, and net houses.

Insect netting is only as effective as its installation. Even the finest mesh—50 mesh, 75 mesh, or 32 mesh—will fail if gaps exist around the frame, bottom edges, doorways, or ventilation points. Thrips, whiteflies, and SWD can slip through openings far smaller than growers expect, and airflow pressure inside a greenhouse can pull insects directly through small leaks.
For high-value crops, “air-tight installation” is the only reliable method.
This approach combines bottom burial, continuous fixing profiles, sealed joints, and a double-door vestibule to ensure all potential leak points are controlled.
What follows is a complete engineer-approved method that growers and contractors can use to build a fully sealed insect-exclusion system.
Why Insect Netting Must Be Installed Using an Air-tight Method
The primary reason insect nets fail is not mesh size—it is leakage. A greenhouse with the correct mesh but a 1–2 mm gap will still experience infestation. Air movement, negative pressure from fans, and wind-induced suction can pull insects inward, even if they never touch the mesh itself.
A correctly installed structure prevents:
- Bottom-edge updrafts
- Sidewall leakage
- Door-frame bypass
- Fan and vent infiltration
- Wind-driven lifting and flapping
An air-tight system is the foundation of physical pest control, reducing pesticide costs and stabilizing crop conditions.
The Four Core Principles of Air-tight Installation
To understand the installation logic, everything depends on four integrated principles:
| Core Principle | What It Prevents | What “Failure” Looks Like | Recommended Standard |
|---|---|---|---|
| Complete bottom sealing (burying) | Crawling entry + wind lift | Loose edge, flapping net, soil gaps | 30–50 cm trench + compacted backfill |
| Seamless fixing (profiles + wiggle wire) | Micro-gaps, slip-out edges | Wrinkles, wire not fully seated | Continuous profiles + gradual tensioning |
| Controlled entry (double-door vestibule) | Entry during human movement | Pest spikes after access/harvest | One door at a time + traps in vestibule |
| Tension & abrasion protection | Tear/leak over time | Corner wear, ridge cuts, sagging | PVC-coated wire + protective strips |
Technical Insight : “Air-tight” means continuity. A single weak point (bottom edge, door, fan frame) can defeat the entire mesh system.
Bottom Sealing: The Trench-Bury Method
Why burying the net is essential
The bottom edge is the most common failure point in insect net installations. If the wind gets underneath the net—even slightly—it creates an opening for pests.
Soil-level entry is the easiest path for pests:
- Crawling insects move beneath loose edges
- Strong winds lift lightweight netting
- Soil erosion enlarges gaps
- Animals can nudge loose edges open
Buried edges ensure that the net cannot move, flap, or shift.
Recommended depth and technique
A standard trench should be:
- 30–50 cm deep
- Continuous around the perimeter
- Compacted firmly after burying
- Sloped outward to reduce soil washout
A buried perimeter acts as a mechanical anchor and a barrier against ground-level penetration.
Alternative methods where burying is not possible
| Method | Application | Limitations |
| Sandbags | Temporary tunnels | Must be continuous; can move during heavy wind |
| Wooden or concrete planks | Hard or rocky ground | Requires frequent checking |
| Aluminum floor channel | Permanent greenhouses | Best long-term sealing; higher cost |
Technical Insight: The decision is not “cheapest vs expensive.” It’s whether you can keep a continuous seal after wind/rain—that’s what determines real-world exclusion.
Fixing the Net: Profile + Wiggle Wire (Spring Wire) System
This system provides the most secure and uniform attachment for greenhouses and net structures. It maintains long-term tension and prevents slippage even under wind load.
Why this system is the industry standard
- Creates a continuous mechanical seal
- Allows tension adjustment over time
- Withstands UV exposure better than rope
- Prevents tearing from flapping
- Enables professional, repeatable installation
Compared with tying, clipping, or stapling, the profile-wire method offers significantly greater durability and sealing performance.
Installation procedure (Step-by-step)
| Step | What To Do | Quick Quality Check |
|---|---|---|
| 1 | Fix aluminum profiles along all structural edges | No missing profile segments |
| 2 | Position the net evenly without folds | Net lies flat before locking |
| 3 | Press wiggle wire fully into the channel | Wire fully seated; no pop-out |
| 4 | Apply tension gradually end-to-end | Even tension; no sagging zones |
| 5 | Seal corners, overlaps, and intersections | No visible openings at joints |
| 6 | Final inspection walk-around | Door/fan seams verified |
Technical Insight: “Even tension” beats “maximum tension.” Uneven tension creates wrinkles, and wrinkles become hidden entry paths.
Common mistakes and how to avoid them
Typical issues include:
- Wrinkles → create micro-gaps and stress points
- Loose tension → net lifts in the wind
- Incomplete wire insertion → slippage or blowing out
- Sharp corners → cut into the mesh over time
Expert Note
Always use PVC-coated wiggle wire to prevent abrasion damage to the net.
NEXT STEPS
Continue Reading
Seal the system—then keep it breathable.
Improve Ventilation
Vent upgrades that let sealed systems run without overheating.
Clean & Maintain
Cleaning and upkeep that protect airflow and extend net life.
Sealing Air Leak Points
Even with good fixing, certain areas require additional sealing.
Joints, overlaps, and frame connections
Structural intersections often have irregular gaps. These must be sealed using:
- Rubber gasket strips
- Foam weather-seal tape
- Mesh patching with adhesive clips
Even millimeter-level openings allow pests through.
Door frame sealing
Door frames are the largest source of insect entry.
Best practices include:
- Adding sealing strips along the frame
- Extending the mesh beyond the door perimeter
- Using aluminum profiles around the door for complete sealing
A single misalignment at the door can invalidate the entire installation.
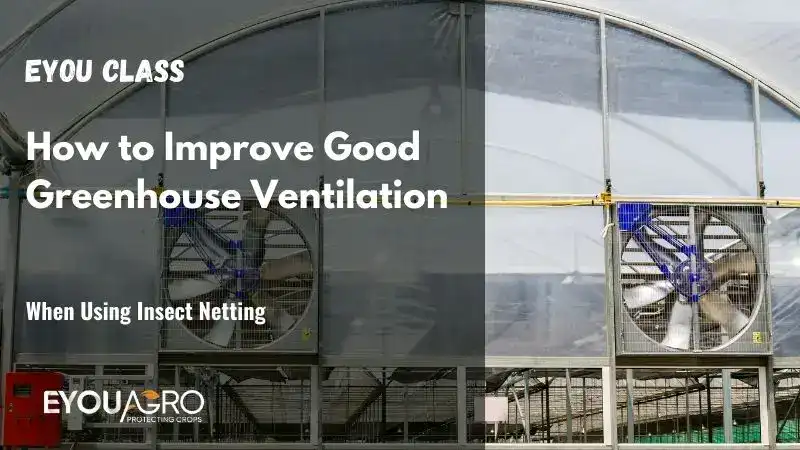
Fans, louvers, and vents
Fans create a strong suction that can pull insects inward.
Recommended solutions:
- Cover fan guards with fine mesh sleeves
- Seal the mounting frame perimeter with rubber trim
- Ensure exhaust fans have backflow-prevention louvers
Engineering Insight
Negative pressure is the most underestimated cause of insect leakage in greenhouses.
Leak-point checklist table (fast inspection)
| Leak Point | Why It Leaks | Recommended Fix | Quick Field Test |
|---|---|---|---|
| Bottom edge | wind lift + erosion | bury / floor channel | dusk “light gap” check |
| Door frame | movement + exchange | sealing strip + profiles | check for visible light lines |
| Profile joints | discontinuity | overlap / patch plates | hand-run seam check |
| Fans & vents | negative pressure suction | sleeve + rubber trim | tissue pull test |
| Intersections | irregular geometry | gasket/foam + patch | visual + touch inspection |
Technical Insight: Most infestations enter through doors, bottom edges, and fan frames—not through the net surface.
Double-door Vestibule (Buffer Zone) Design

Why the buffer zone is essential
A vestibule functions as a controlled transition area, preventing insects from entering during worker access.
Human movement disturbs the air and carries insects. A vestibule:
- Reduces airflow exchange
- Captures insects on sticky traps
- Prevents direct suction of pests into the greenhouse
It is standard practice in professional IPM facilities.
Dimensions and configuration
Recommended:
- Minimum 1.5 m × 2.0 m
- Outer and inner doors must not open simultaneously
- Allow enough room for inspection
Internal fittings
The vestibule should include:
| Component | Purpose |
| Sticky traps | Capture hitchhiking insects |
| Low-pressure fan or air curtain | Push insects outward |
| Cleaning area for tools or crates | Prevents pest introduction via equipment |
Technical Insight: The vestibule is not “extra.” It’s a bio-secure airflow control zone—especially critical when workers enter frequently.
Tension Control and Protection Against Abrasion
Proper tension ensures sealing, while reinforcement prevents long-term wear.
Importance of tension
A tight net:
- Resists uplifting wind pressure
- Prevents structural sagging
- Eliminates wrinkle gaps
- Extends the net’s lifespan
Slack nets are a major cause of tearing and leakage.
High-stress areas requiring reinforcement
| High-Stress Zone | Common Damage | Protection Method |
|---|---|---|
| Ridge lines | cutting + abrasion | PVC protective strips |
| Sidewall top edges | flapping wear | anti-friction tape |
| Door corners | repeated rubbing | reinforcement patches |
| Fan frames | vibration wear | rubber trim + sleeve |
| Pipe intersections | point contact cuts | cover/sleeve contact points |
Technical Insight: Abrasion is often a bigger long-term enemy than UV. Protect contact points early to prevent “slow leaks.”
Common Installation Errors and Solutions
| Common Error | What Happens | Fix | Prevention |
|---|---|---|---|
| No burying / too shallow | pests enter from ground | re-bury or continuous sealing | trench spec in contractor scope |
| Wrinkles / tension imbalance | hidden entry paths | re-tension via profile system | tension gradually and evenly |
| Gaps between profile sections | infiltration channels | overlap profiles / patch plates | continuous-run rule |
| Door not sealed | biggest leak point | sealing strips + vestibule | daily “light gap” check |
| Sharp edges unprotected | net tears over time | cover contact points | install protective strips |
Technical Insight: If you only fix two areas, fix doors + ground edges first—they cause the majority of real failures.
Air-tight Installation Checklist
A professional-quality installation must pass the following checks:
| Zone | Must Pass | Fail Example |
|---|---|---|
| Ground-level | fully sealed perimeter | loose edge / soil washed out |
| Sidewalls | profiles continuous + wire seated | wire popped out / wrinkles |
| Doors | no light gaps + strips intact | misalignment at frame |
| Fans/Vents | sleeves + perimeter trim | insects drawn in by suction |
| Roof/High areas | protected contact points | ridge cut marks / sagging |
Technical Insight: This table can be used as a contractor acceptance checklist—it makes quality measurable and reduces disputes.
CROSS-TOPIC
Build the Full System
Two checks to make sealing actually work.
Ventilation Overheat
Fine mesh + tight sealing can trap heat—know the airflow limits.
S8 · How To Choose (Step-by-step)
Pick a mesh spec your structure can support—before you install.
FAQ- How to install insect netting
Why is air-tight installation more important than mesh size?
Even a correctly sized mesh aperture cannot prevent insects if gaps exist around doors, frames, fans, or the ground. Air-tight installation prevents airflow-driven pest entry and ensures full exclusion performance.
How deep should insect netting be buried to prevent pest entry?
A depth of 30–50 cm is recommended for permanent installations. This prevents wind uplift, soil gaps, and crawling insects from bypassing the mesh.
Why are profiles and wiggle wires recommended instead of clips or rope?
Profiles provide continuous tension and sealing, while wiggle wires secure the net. This combination prevents slippage, withstands wind pressure, and avoids the micro-gaps created by clips or rope systems.
Why is the door area the biggest leak point in greenhouses?
Doors experience constant movement and air exchange. Without sealing strips and a vestibule, insects follow airflow and human activity directly into the structure.
How does a double-door vestibule prevent insect entry?
The vestibule stabilizes airflow, captures insects on sticky traps, and prevents suction currents. Only one door opens at a time, creating a bio-secure entrance.
What are the most common installation mistakes growers should avoid?
The most common errors include: shallow burying, wrinkled nets, discontinuous profiles, unsealed door frames, and unprotected sharp edges that cut the net over time.
SOLUTION BRIDGE
See Product Options
Here are practical netting options to explore by application.

Conclusion:
Three Principles for Reliable Insect Exclusion
- Mesh size alone cannot ensure exclusion
Without sealing, even ultra-fine nets fail. - Small gaps matter more than apertures
A 5 mm opening is far worse than a 0.6 mm mesh aperture. - Installation quality determines longevity and performance
A well-installed system reduces pesticide use, lowers production risk, and stabilizes greenhouse microclimates.
Air-tight installation transforms insect netting from a simple cover into a complete pest-exclusion system.

Next Reading
From a technical support perspective, the most reliable method is Crop → Key pest → Minimum safe aperture → Ventilation & pollination plan, because a net that blocks pests but overheats the crop is not a win.
— Kevin Lyu, EyouAgro

